How to Spray Paint Interior Walls

How to Spray Paint Interior Walls

Video: How to Spray Paint Interior Walls *Currently 12k views

paintenance melbourne logo

Choosing Interior Wall Spray Painting

If you want an alternative to painting your walls with a roller and brushes, then you might consider spray painting.

A lot of professional painters use a mix of spray painting, roller painting and brush painting, depending on the surface being painted.

If you’re just painting a single wall, it may not be worth spray painting. On the other hand, if you have several large areas to paint it might be worth the set-up time.
why choose spray painting

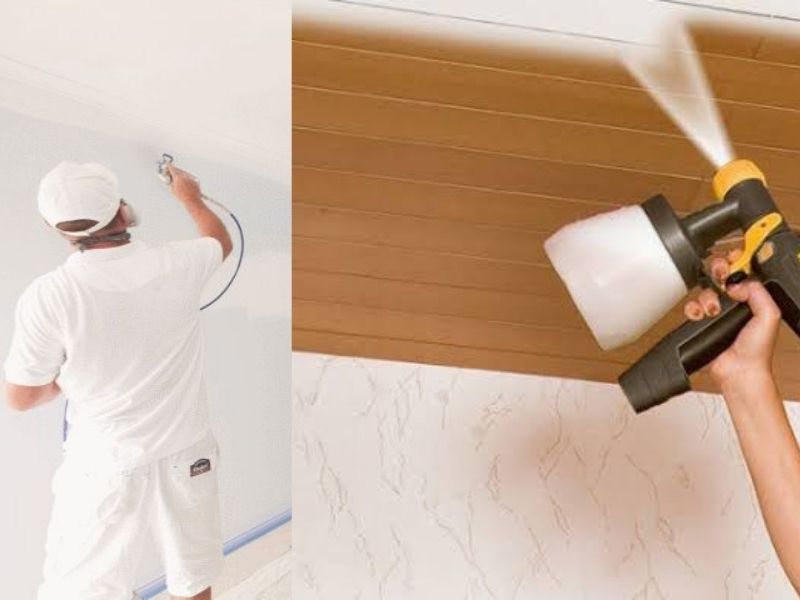
Why would you choose spray painting?

First of all, it’s tough to beat the smooth surface of a sprayed-on paint finish for uniform coverage.

Secondly, you have a bit more control over the finished paint job. Want a perfect finish with razor-sharp lines? Then spray painting is for you.

Thirdly, spray painting can be the fastest way to paint large areas – if you do it right!

Downside of Spray Painting

There’s more preparation involved with spray painting. The techniques are harder to master, and you’ll need more equipment.

It’s also easy to over-spray, so preparation is everything!
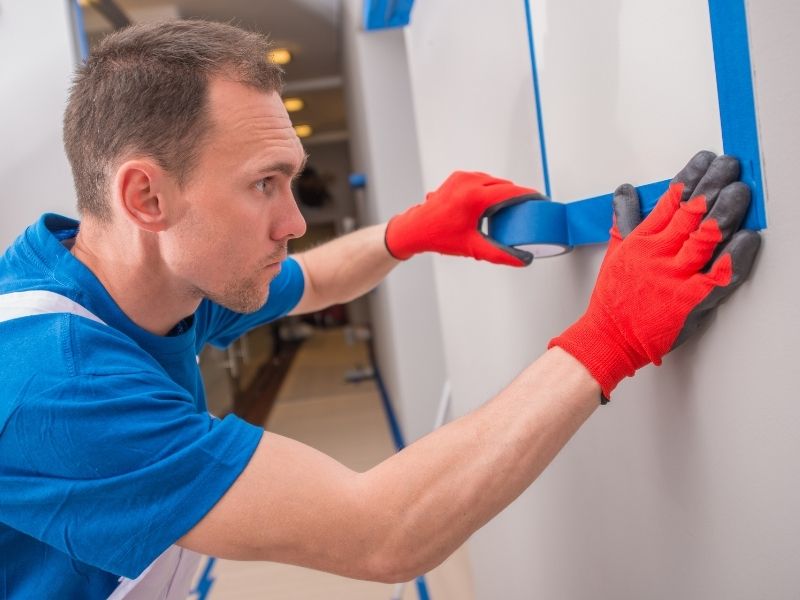
Prepare Your wall for Interior Spray Painting

Prepare Your Wall for Interior Spray Painting

Spray paint is thinner than paint you apply with a roller.

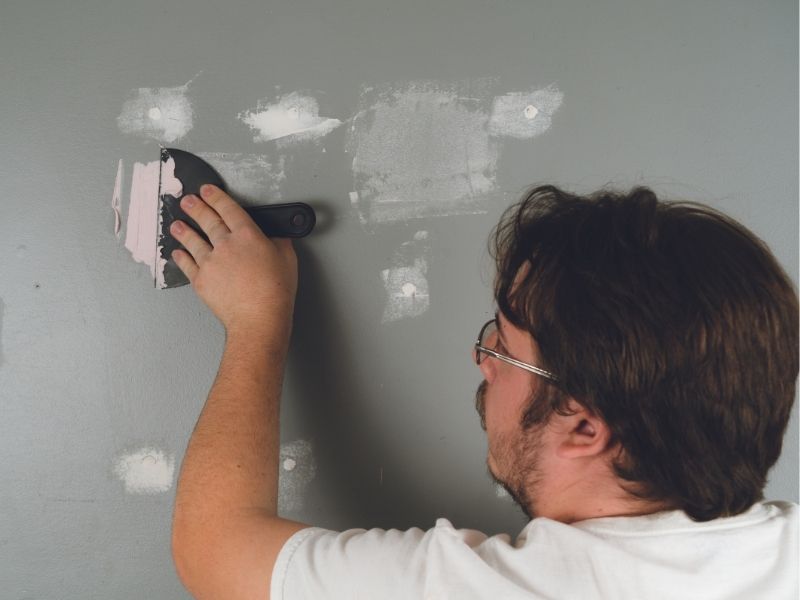
This means you should fill all cracks, holes and uneven spots in your walls first.

Your walls should be perfectly smooth, because any uneven places will stand out after you’ve spray painted your walls.
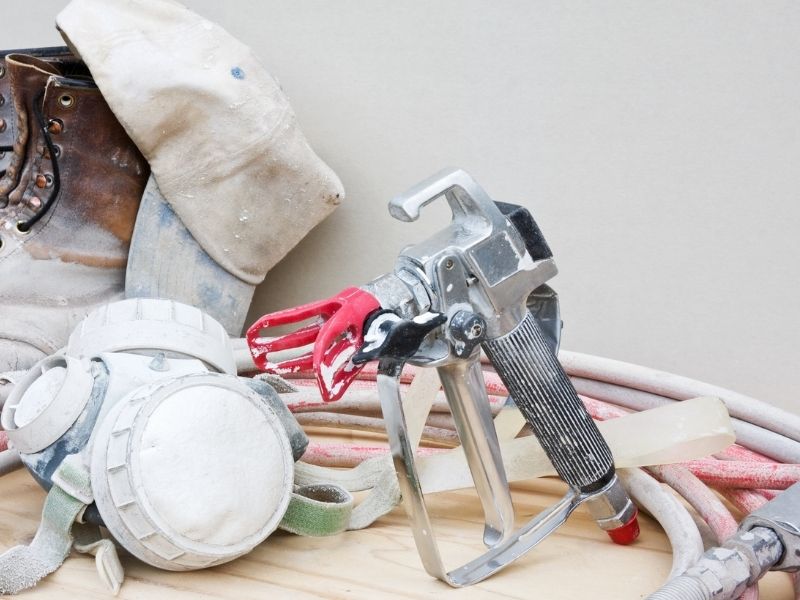
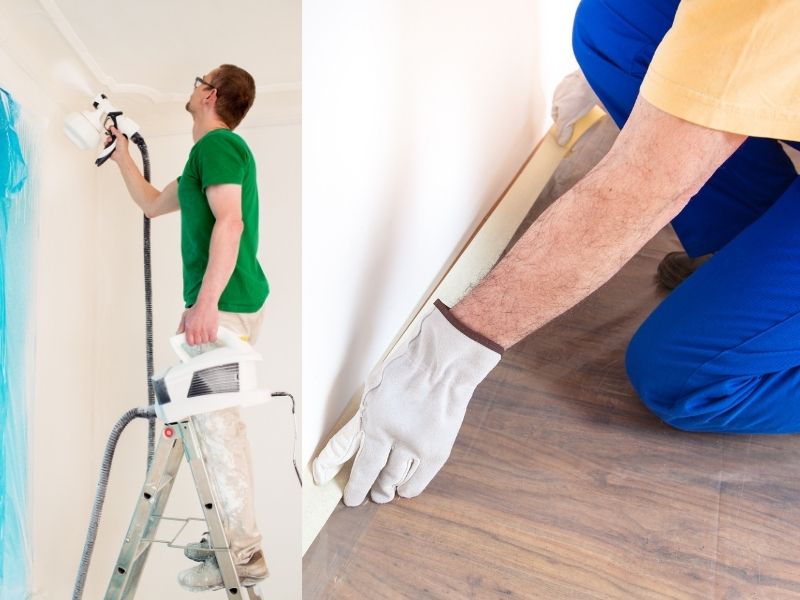
Spray Painting Equipment

Spray Painting Equipment

If you don’t have your own, you can rent or buy spray painting equipment.

Airless sprayers may be better than sprayers that need air.

Airless sprayers are easier to use, and you won’t have heavy equipment to lug around when spray painting walls in different parts of your home.

Airless sprayers are fast, covering more area in less time than other types of paint sprayers. As a bonus, they handle most types of paint without requiring thinning of the paint.

Also, these types of spray guns create less overspray, which means that more of your paint ends up on the wall instead of in the air!

You will also need:

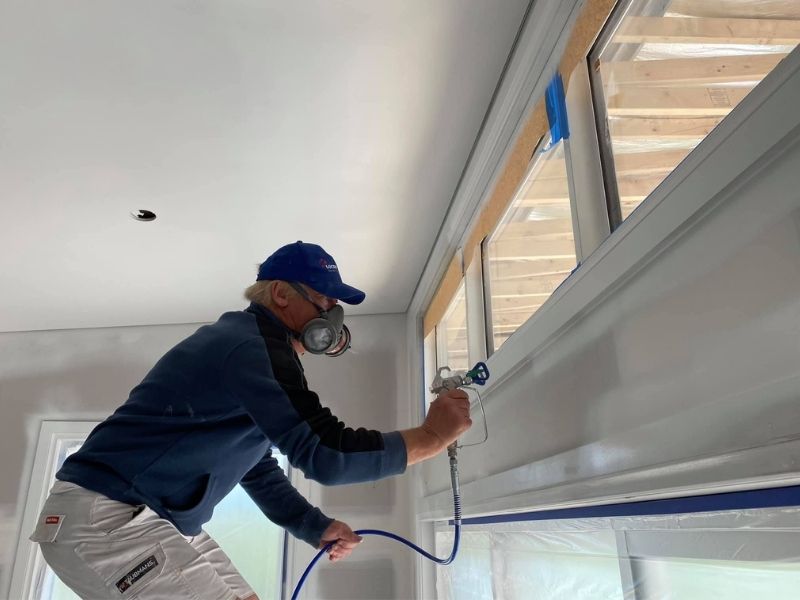
  • A respirator or gas mask
  • Eye protection, such as goggles
  • Long sleeved clothes
  • Long pants
  • Head covering
  • Drop sheets
  • Masking tape
  • Plastic and plastic bags

prepare your room for spray painting

Prepare Your Room for Interior Spray Painting

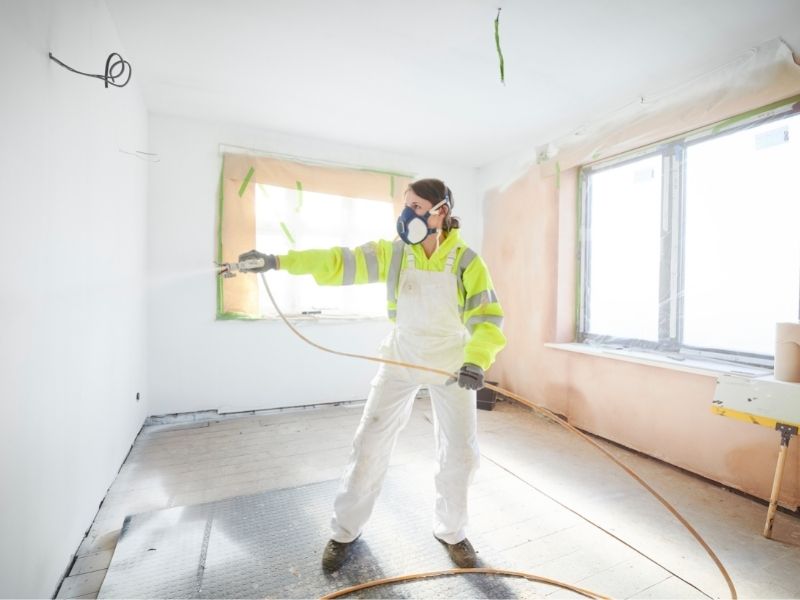
Spraying paint indoors generates a mist of paint. This mist, or tiny droplets of paint, can cover everything in the room if you’re not careful.

Whatever you don’t want painted in the room, you need to mask.

Cover the floor with drop sheets, taping them to the edges of the wall.

Mask or cover light switches and skirting boards.

Remove heating and air conditioning vent covers. Apply masking tape over any remaining switches and outlets.

Windows should be covered with plastic sheeting, taped around the edges.

Cover doors, sealing off doorways and door jamb edges.

Move as much furniture out of the room as possible. For any remaining furniture, move this to the middle of the room and cover it completely. Allow plenty of space for your tools and equipment.

Cover Yourself

You’ll need to cover and protect yourself while doing interior spray painting.

You should wear old clothes with long sleeves and long pants. Put on old shoes or sneakers, wear a hat and use safety googles.

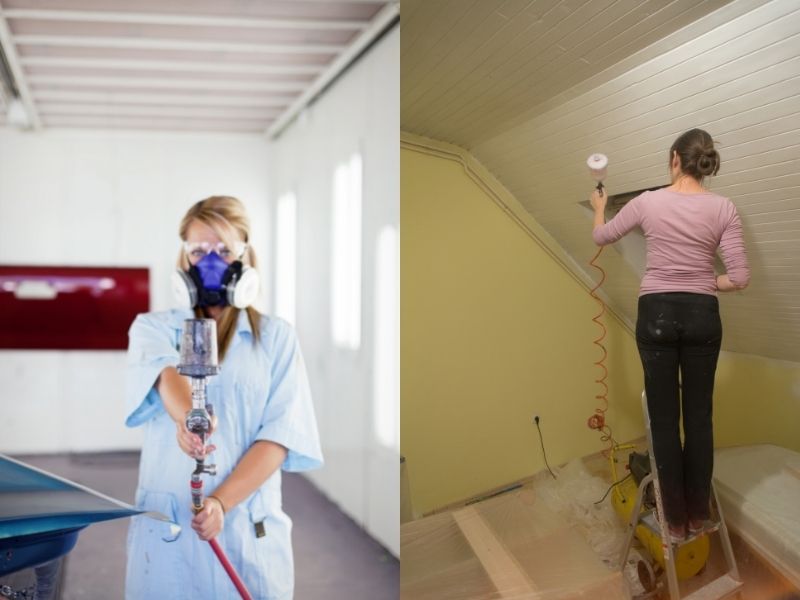
A gas mask or respirator is recommended to cover your mouth and nose.

Using a Spray Gun

Using a Spray Gun

If you’re not familiar with your equipment, read the directions carefully.

Make sure you understand how to fill the spray gun with paint, how to adjust the paint nozzle and how to thin the paint to the right consistency.

It’s a good idea to do a little painting practice on a piece of scrap cardboard or plywood, for example.

Practise so that you can work out the correct distance to spray and stick to that distance while painting.

Set the sprayer in motion before squeezing the trigger. Then release it before stopping when you reach the end of a pass.

Don’t spray paint in a wide arc, as this can cause the paint to be thicker in the middle and thinner on each side.

Hold the spray gun about 250-300mm from the wall and spray in smooth, even sweeps.

Move your whole arm to ensure even coverage, rather than bending at the wrist.

More Interior Spray-Painting Tips

To avoid patchiness, don’t stop until the entire wall is covered.

Spray the outer edges of the wall first, “banding” the area that you will spray and cutting in any corners.

For inside corners, aim the spray tip directly into the corner so it overlaps both sides.

When you have finished the corners, stand in one area and move at a steady pace.

Keep spraying as far as you can reach with the spray gun at a 90-degree angle.

When you move to the next part of the wall, overlap vertically and horizontally. This will help you get an even coat of paint on the walls.

Spray around windows and doors first. Then spray the remaining flat areas using overlapping strokes.

Repeatedly spray paint down the walls, pointing the spray gun tip at the edge of the previous pass and overlap by one-third to 50 percent.

Just as you would do if using a roller and brush, you’ll need to let the paint dry and do a second coat.

cleaning up after spray painting

Cleaning Up

Allow significant time for the paint to dry before removing masking tape. This will result in crisp, clean lines.

Remove all coverings from furniture and other areas.

Replace any lighting fixtures that you removed and move furniture or other items back into place.

Make sure you clean your airless spray gun after each use. Follow the directions in the user’s manual.

Interior Spray Painting

Interior Spray Painting for Faster, Superior Results

For a skilled painter, it can be much faster to spray-paint interior walls than using a roller and a brush.

Preparation and practise are essential for optimal results. Once you get your pacing and rhythm right you can learn to spray paint interior walls quickly and with precision.

You might even find you prefer this method to standard roller and brush painting!

leave it to the professional spray painters

…Or Leave it To the Professionals!

If spray painting your walls (and other areas like ceilings, stairs, fences, woodwork, and cabinetry) sounds like way too much time and trouble to master, then go with the pros!

Paintenance Melbourne is a leader in spray painting. We use the latest equipment and cutting-edge techniques to suit a wide range of paint jobs.

Our expert spray-painting delivers flawless mirror-like finishes in a fraction of the time that more traditional painting methods would take. And certainly, a lot quicker than the average DIY home painter!

Contact us today for a free quote, or to discuss how your next painting job might benefit from our advanced spray painting services.

How to Prepare Your Home for Interior Painting

How to Prepare Your Home for Interior Painting

paintenance melbourne logo

Prepare Your Home for Professional Interior Painting

Okay, so you’ve made the wise decision to invest in a professional painter to paint your home interior. Congratulations!

The next steps are simple.

You get a quote, then book your chosen painter to paint your house.

They turn up with their equipment, ready to go. That’s all, right?

Wrong.

There is plenty to do before your painting pro can start on your next interior paint job.

A professional painter can help you get the job done quickly with top-notch results. Knowing how to get your house ready is super-helpful when preparing for a large project.

Remember, unless otherwise agreed with the painting company, it may be up to you to make sure your home is adequately prepared.

The first step for paint preparation is to get in touch with your professional house painting service.

You should find out what extras or optional services they offer if you do not want to do the prep work.

  • Does the crew fix minor repair issues?
  • Who should patch up nail holes and small dents?
  • What cleaning methods work best for prepping your walls for paint?

Some painting firms will take care of at least some of the prep in accordance with your arrangement, but there are still certain steps you should take ahead of time.

Here are some expert tips to save yourself time, hassle, and money on a professional paint job.

remove breakable items

1. Remove All Breakable Items and Wall Hangings

To begin with, protect any breakable or fragile items.

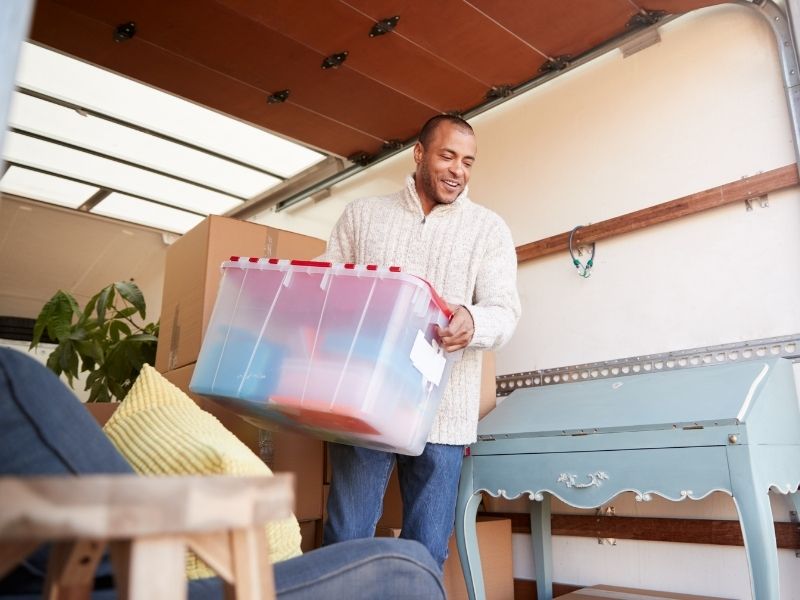
Move all breakable items out of the rooms to be painted.

Make sure they are boxed and stored away so your painter can move your furniture quickly and easily.

The same goes for ornaments or free-standing decorative items you might have about the place.

It’s also a good idea to take out anything that may be hanging on the walls to be painted and putting them in a safe place.

Painters are not going to get their job done if there are still mirrors, photos and other decorative bits and pieces all over your walls.

Rather than fumbling around and trying to get the job done after the arrival of the painters, take down your decorative features and make sure they’re stored somewhere safe.

Don’t take chances with your most precious objects. You might want to consider a temporary storage room, such as a basement, attic, or garage.

Handy hint – if you want picture hooks removed (or left on walls) please use a grey-lead pencil for any instructions (no sticky-tape, pens or textas please – to avoid expensive patch-up jobs!).

remove curtains, blinds

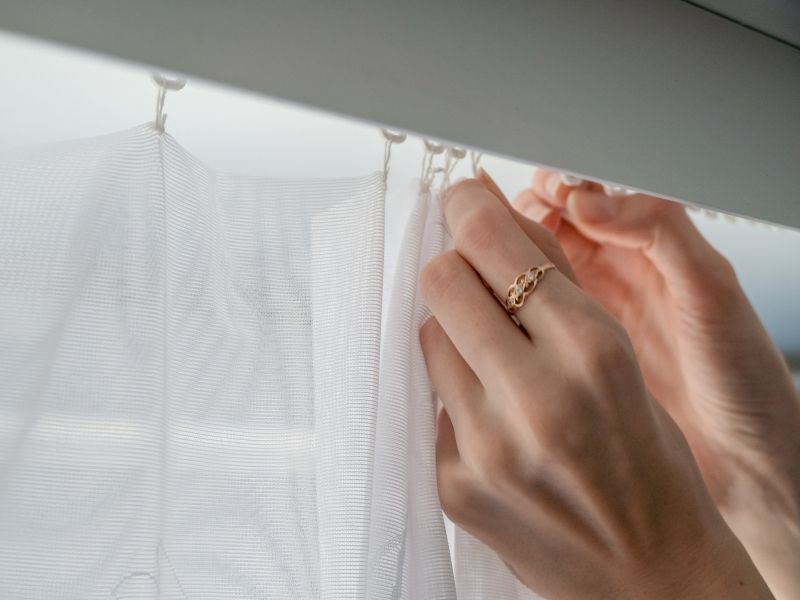
2. Remove your curtains, blinds, rugs and throws

Remove your curtains and blinds before your painter starts – or you’ll pay extra for the service.

A day or two before you plan to prepare the area for the paint crew, take down drapes and remove fabric items such as rugs from the space.

When you roll up your rugs, you can secure the carpet with a fabric tie. Putting plastic or a tarp over valuable items can protect them while the paint crew is working.

No one wants to walk into a freshly painted room to find expensive rugs and throws with paint splatter and splash marks. Accidents happen, but you can avoid these problems by removing the fabrics before the crew shows up.

If you’re installing new carpet when you’re having your house painted, we recommend you have your painter cut a strip around the wall to paint your skirting down to the floor. This avoids additional time and cost for extra painting work, when new carpet is installed at a lower height than the old carpet.

Access and Obstructions

3. Consider Access and Obstructions

Leave enough room from your walls (at least 2 metres) for your painter to place his ladder and work safely and efficiently.

Please don’t stack items under beds, so that they can be moved easily.

It is a good idea to carefully consider access and any obstructions that could potentially get in the way of the painters.

Move bulky items of furniture out of the way if you can and keep the area to be worked on as free of obstructions as possible.

The easier it is for your chosen painting team to get the job done, the faster and more efficiently it will be finished.

Not only this, but faster and easier paint jobs can also be considerably cheaper than those that are unnecessarily challenging.

wall preparation

4. Wall Preparation

Speak to your chosen painting service before they visit your home regarding whether or not you will be expected to carry out any kind of wall preparations.

Your painter may request that you clean the walls a few days prior to the paint crew’s arrival. This ensures there is a good, dry surface for the paint to adhere to. Some painters offer to clean the walls for an additional fee.

The same also goes for any kind of damage or deterioration of the materials to be painted themselves. If for example you have problems with rotting wood, rusting metal or infestations of any kind, these will need to be addressed prior to the painting going ahead.

Clean the Room

5. Clean the Room

It’s a very good idea to give the room a full, thorough clean, prior to the new paint being applied.

The last thing you want is to allow dust and dirt lurking in the room to be stirred up and settle on the surface of your once-flawless new paint job – before it even had a chance to dry.

The day before the painting is to be done you should clean the room thoroughly.

Vacuum the walls, ceiling and floor. Vacuum and polish any furniture being left in the room during painting. Once you clean the room, try to prevent anyone from entering the space.

Then, for 24 hours after the painting is done, try not to track any dirt or debris into the room until the paint dries thoroughly.

Remove Kids and Pets

6. Vacate the House and Remove Kids and Pets

Make sure you plan to ensure that kids, pets and people in general are kept as far away from the workspace as possible.

The aim is to minimize the likelihood of messy accidents. You might even be able to arrange for the job to be done and finished while nobody’s home at all.

Professionally painting your house will take some time.

If you have pets, ask friends or family to look after them for a while, until the painting work is done. Placing your pets in a kennel is an option if you do not have someone you can ask to help.

Another strategy is to set up an area in another part of the house for the kids to play in and the pets to stay in.

You are paying an interior house painter to paint your home. If they can remain focused on the job, it will get done faster and produce a better result.

If they are constantly distracted by your kids or your pets, it will take them longer to finish and could result in a poor painted finish.

consider your painter

7 – Other considerations

Here are a few other considerations that can help you get the most out of your professional painting experience:

  • Designate a specific toilet and bathroom for your painters’ use.
  • Provide facilities on site for painters to clean their brushes, rollers and spray gun. If you don’t, then let your painter know, as there may be an additional cost for cleaning these off-site.
  • Set aside storage for your painters to leave their equipment. This will minimize time they might spend going back and forth to their vehicles and help them focus on completing the paint job.

Always Ask in Advance

Every painting job is unique.

When you hire professional interior house painting services, it’s always advisable to ask what type of preparations you need to make. They might have specific needs in your home that is not common in others.

Asking in advance will ensure you are ready for the painting crew the moment they arrive at your home. This will save you time and money.

If you want to know what preparations we prefer you to make before painting your home, give us a call on 0404 227 330!

13 Painting Problems and How To Fix Them

13 Painting Problems and How To Fix Them

paintenance melbourne logo

Potential Painting Problems

Thinking of painting your house?

Have you watched all those home renovation and do-it-yourself shows for years, and thought, ‘how hard could it be’?

Sounds easy in principle.

Get some tins of paint, a couple of brushes, rollers, a few drop-sheets and hey presto, you’re set to go!

Don’t be fooled though.

Like most things in life, what seems simple and easy on the surface often hides several unforeseen pitfalls.

There are plenty of potential problems in store for the home painter.

Painting problems that could cost you lots of money, time, and frustration.

Problems you could avoid.

We’re here to help!

Here’s a list of 13 of the most common painting problems and how to fix them.

paint blistering

Painting Problem One: Blistering

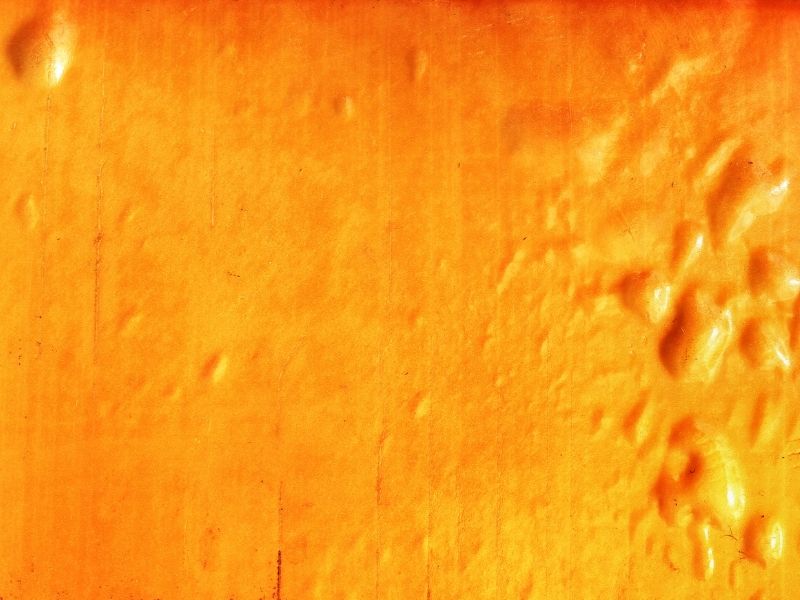
Blistering occurs when bubbles form under the surface of your wall paint.

Paint blistering can be caused by:

  • Applying oil-based or alkyd paint over a damp or wet surface.
  • Moisture seeping through the exterior walls or interior walls such as bathrooms.
  • Painting during high humidity, or exposure of acrylic paint to high humidity or moisture soon after the paint has dried.
  • Inadequate surface preparation.

Solutions to Paint Blistering:

  • Avoid painting during high humidity or if a high dew point is present.
  • Allow adequate drying time before reapplying paint.
  • If the paint blisters don’t go down to the substrate, then remove blisters by scraping, and sanding, and repaint with a quality acrylic interior paint.
  • If blisters go down to the substrate then remove the source of moisture, if possible. Repair any loose sealant and consider installing vents or exhaust fans. Remove blisters by scraping and sanding, and remember to prime before applying the topcoat.

paint cracking / flaking

Painting Problem Two: Cracking/Flaking

Cracking or flaking paint happens with the splitting of a film of dry paint.

Paint cracking may be caused by:

  • Aging of paint.
  • Moisture under the film of paint.
  • Use of inferior quality paint coatings which when dry is inflexible.
  • Overthinning or overspreading the paint.
  • Inadequate surface preparation, or applying the paint to bare wood without first applying a primer.
  • If paint is applied to a moist or excessively hot surface, or where an inferior coating has been unevenly applied, flaking may be the result.
  • Improper mixing of paint or uneven application of the coating are other known factors that cause cracking. The result of this is a breakup and peeling of the coating.

Solutions to Paint Cracking or Flaking:

  • Complete removal of the existing coatings, all loose and flaking paint with a scraper or wire brush, sanding the surface and feathering the edges.
  • Do not repaint until the surface is completely dry.
  • Use a good quality paint and ensure it is thoroughly stirred before proceeding.
  • If flaking occurs in multiple layers of paint the use of a filler may be necessary.
  • Prime bare wood areas before repainting.
  • Use of a top-quality primer and topcoat should prevent a recurrence of the problem.

paint foaming

Painting Problem Three:  Foaming/Cratering

The formation of bubbles in the paint, known as foaming, and small, round concave depressions (cratering) occurs when bubbles break during paint application and drying.

Paint foaming and cratering can be caused by:

  • Shaking a partially filled can of paint.
  • Use of low-quality paint or very old acrylic paints.
  • Applying (especially rolling) paint too rapidly.
  • Use of a roller cover with wrong nap length.
  • Excessive rolling or brushing of the paint.
  • Applying a gloss or semigloss paint over a porous surface.

Solutions to Paint Foaming and Cratering:

  • While paints will foam to some degree during application, higher quality paints are formulated so the bubbles break while the paint is still wet, allowing for good flow and appearance.
  • Avoid excessive rolling or brushing of the paint or using paint that is more than a year old.
  • Apply gloss and semigloss paints with a short nap roller and apply an appropriate sealer or primer before using such paint over a porous surface.
  • Problem areas should be sanded before repainting.

paint framing

Painting Problem Four: Framing

Framing happens when a wall is painted with a roller but is brushed at the edges and corners. The brushed areas appear darker, resembling the frame of a picture.

Framing may also occur when sprayed areas look darker than neighbouring sections that are brushed or rolled.

Paint framing may be caused by:

  • Framing with paint may occur because brushes result in a lower spreadrate than rollers, which produces a thicker layer of paint.
  • Failure to maintain a “wet edge” when painting.
  • Use of a low solids “economy” paint.

Solutions to Framing:

  • Ensure adequate coverage is achieved across the entire wall.
  • Maintain a wet edge when painting by applying paint toward the unpainted area and then back into the just painted surface.
  • Work in smaller sections of the room to maintain a ‘wet edge’ and ensure spread rates between brushes and rollers are similar.
  • With tinted paints, be sure to use the correct colourant-base combinations.
  • Factory colours, as well as in-store tints, should be thoroughly shaken at time of sale, and the paint should be stirred well prior to use.

paint mildew

Painting Problem Five: Mildew

Mildew happens when black, grey or brown spots or areas appear on the surface of paint or sealant.

Paint mildew may be caused by:

  • Painting on areas that are damp or receive little or no direct sunlight (such as bathrooms, kitchens and laundry rooms).
  • Use of an enamel/oil based or oil-based paint, or lower quality acrylic paint.
  • Failure to prime bare wood surface before applying the paint.
  • Painting over a substrate or coating on which mildew has not been removed.

Solutions to Mildew:

  • Apply a few drops of household bleach to the area to test for mildew.
  • If it is bleached away, the discoloured area is most likely mildew.
  • Remove all mildew from the surface by scrubbing with a diluted household bleach solution (one part bleach, three parts water), while wearing rubber gloves and eye protection. Rinse thoroughly.
  • To protect against mildew, use a top-quality acrylic paint, and clean when necessary with bleach/detergent solution.
  • Consider installing an exhaust fan in high moisture areas.

mud cracking

Painting Problem Six: Mud Cracking

Mud cracking is characterised by deep, irregular cracks that resemble dried mud in dry paint film.

Mud cracking may be caused by:

  • Paint applied too thickly over a porous surface, or to improve inherent poor hiding (coverage) of a lower quality paint.
  • Where paint is allowed to build up in corners upon application.

Solutions to Mud Cracking:

  • Remove the cracked paintwork by scraping and sanding.
  • Prime and repaint, using a top-quality acrylic paint.
  • This type of paint is likely to prevent recurrence of mud cracking because it is relatively more flexible than alkyd paint, oil-based paint and ordinary acrylic paint. Premium quality paints have a higher solids content, which reduces the tendency to mud crack. They also have very good application and hiding properties, which minimise the tendency to apply the paint too thick a coat of paint.

paint hiding

Painting Problem Seven: Poor Hiding

Poor hiding is the failure of dried paint to obscure or “hide” the surface to which it is applied.

Poor hiding may be caused by:

  • Use of low-quality paint.
  • Use of low-quality tools or the wrong roller cover.
  • Use of an improper combination of tinting base and tinting colour.
  • Poor flow and leveling.
  • Use of a paint that is much lighter in colour than the substrate, or that primarily contains low-hiding organic pigments.
  • Application of paint at a higher spread rate than recommended.

Solutions to Poor Hiding:

  • If the substrate is significantly darker or is a patterned wallpaper, it should be primed before applying a topcoat.
  • Always use premium quality paint for better hiding and flow.
  • Using quality tools is also important as well as the recommended roller nap, if using a roller.
  • Follow manufacturer’s recommendation on spread rate.
  • If using tinted paint, use the correct tinting base.
  • Where a low-hiding organic colour must be used, apply a primer first.

poor scrub resistance

Painting Problem Eight: Poor Scrub Resistance

Poor scrub resistance refers to the wearing away or removal of the paint film when scrubbed with a brush, sponge, or cloth.

Poor scrub resistance may be caused by:

  • Choosing the wrong sheen for the area.
  • Use of lower quality paint.
  • Use of an overly aggressive scrub medium.
  • Inadequate dry time allowed after application of the paint before washing it.

Solutions to Poor Scrub Resistance:

  • Areas that require frequent cleaning should be painted with a highly washable premium quality paint that is specially formulated to provide scrub resistance.
  • High traffic areas may require a low sheen, semi-gloss or gloss paint rather than a flat paint because the additional gloss is less porous and provides improved scrub resistance.
  • Allow adequate dry time, as scrub resistance will not fully develop until the paint is thoroughly cured. Typically, this will be one week.
  • Try washing the painted surface with the least abrasive material and mildest detergent first.

Poor Sheen Uniformity

Painting Problem Nine: Poor Sheen Uniformity

Poor sheen uniformity is when shiny spots or dull spots (also known as “flashing”) on a painted surface, uneven gloss.

Poor sheen uniformity may be caused by:

  • Uneven spread rate.
  • Failure to properly prime a porous surface, or surface with varying degrees of porosity.
  • Poor application resulting in ‘lapping’.

Solutions to Poor sheen uniformity:

  • New substrates should always be primed and sealed before applying the topcoat to ensure a uniformly porous surface.
  • Make sure to apply paint from “wet to dry” to prevent lapping. Often, applying an additional coat will even out sheen irregularities.
  • Without the use of a primer or sealer, it’s likely you’ll need an additional coat of paint to even out any sheen irregularities.

Paint Stain Resistance

Painting Problem Ten: Poor Stain Resistance

Poor stain resistance is the failure of paint to resist the absorption of dirt and stains.

Poor stain resistance may be caused by:

  • Use of lower quality paint that is porous in nature.
  • Application of paint to un-primed substrate.

Solutions to Poor Stain Resistance:

  • Higher quality acrylic paints contain more binder, which helps prevent stains from penetrating the painted surface, allowing for easy removal.
  • Priming new surfaces reduces the porosity of the substrate; the correct film thickness in the topcoat will maximize stain resistance.

Roller Marks

Painting Problem Eleven: Roller Marks / Stipple

Roller marks or stipple is the unintentional textured pattern that is left in the paint by the roller.

Roller marks or stipple may be caused by:

  • The incorrect roller cover is used.
  • Lower quality paints.
  • Use of low-quality rollers.
  • The incorrect rolling technique is applied.

Solutions to Roller marks or Stipple:

  • Use the proper roller cover.
  • Avoid too long a nap for the paint and the substrate.
  • Use quality roller to ensure adequate film thickness and uniformity.
  • High quality paints tend to roll on more evenly due to their higher solids content and leveling properties.
  • Pre-dampen roller covers used with acrylic paint; shake out excess water.
  • Don’t let paint build up at roller ends.
  • Begin rolling at a corner near the ceiling and work down the wall in three-foot square sections.
  • Spread the paint in a zigzag “M” or “W” pattern, beginning with an upward stroke to minimise spatter; then, without lifting the roller from the surface, fill in the zigzag pattern with even, parallel strokes.

sagging paint

Painting Problem Twelve: Sagging

Sagging is the downward “drooping” movement of the paint film immediately after application, resulting in an uneven coating.

Sagging may be caused by:

  • Application of a heavy coat of paint.
  • Painting in excessively humid and/or cool conditions.
  • Application of over-thinned paint.
  • Airless spraying with the gun too close to the surface being painted.

Solutions to Sagging:

  • If the paint is still wet, immediately brush out or re-roll to redistribute the excess evenly.
  • If your paint has already dried, sand and reapply a new coat of top-quality paint.
  • Do not thin the paint; avoid cool or humid conditions; sand glossy surfaces.
  • Always apply paint according to recommended spread rate and avoid overloading with thick paint layer.
  • Two coats of paint at the recommended spread rate are better than one heavy coat, which can also lead to sagging. In this instance, gravity is not your friend, so consider removing doors to paint, while supported horizontally.

paint yellowing

Painting Problem Thirteen: Yellowing

Yellowing is the development of a yellow cast in aging paint which is most noticeable in the dried films of white paints or clear varnishes.

Yellowing can be caused by:

  • Oxidation of alkyd or oil-based paint or varnish
  • Heat from household items like stoves and heaters, or a lack of light to the area.
  • It is also caused by exposure to ammonia from adjacent acrylic paint application in the same room. Ammonia can oxidize the alkyd component in the oil-based enamel and cause premature yellowing.

Solutions to yellowing:

  • Top quality acrylic paints do not tend to yellow, nor does non-yellowing varnish.
  • Where possible, choose a top-quality water-based paint and/or a non-yellowing varnish.

do your painting right

Do Your Painting Right

We hope you found this list of common paint problems and their solutions helpful.

If you are going to do painting yourself, it’s important to do it right.

Always use high quality paints and tools.

Do not skimp on materials or correct techniques. It is just not worth the time or hassle.

On the other hand, if you decide not to risk all the potential problems and pitfalls of DIY painting, and you want to guarantee a top-quality premium painting finish for your home or office, please contact us today on 0404 227 330 for a free quote!

P.S. You can now get a free quote yourself in seconds with our new online quote estimator.

*Thanks to Haymes Paint and Dulux for most of the information used in this list

for Website sale conversion page -->